
Mercedes-AMG brakes, Dallas & Plano
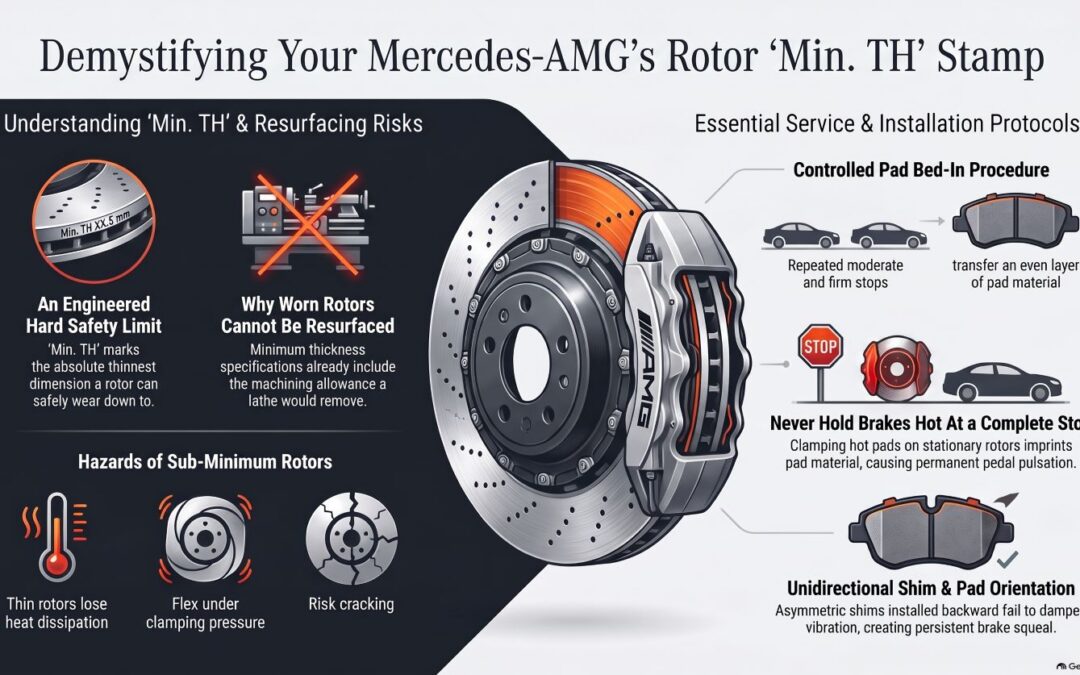
Somewhere on every AMG brake rotor there is a small stamped number most owners never see. It is the thickness at which the manufacturer says the rotor is finished, and it tells you more about your brakes than pad life, pedal feel or mileage ever will.
The short answer
"MIN. TH." means minimum thickness. The number after it, in millimeters, is the thinnest the rotor's friction surface is allowed to be. At or below that figure, the rotor must be replaced, even if it looks fine and even if the pads still have life left. Below the stamp, the rotor holds less heat, runs hotter on every stop, and gives up the safety margin the brake system was designed around.
From our service bay
Most drivers know their brake pads wear out. Far fewer know that the rotor underneath has its own built-in expiration date, stamped into the metal at the factory rather than decided by a mechanic on the fly.
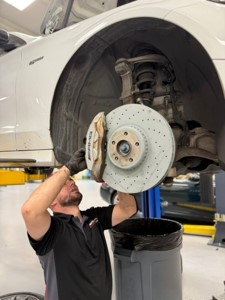
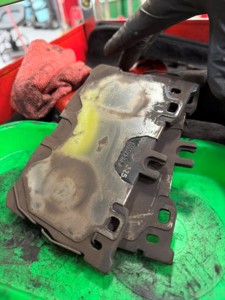
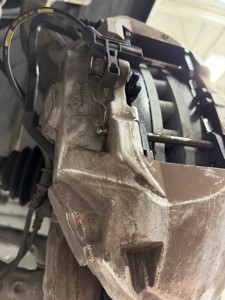
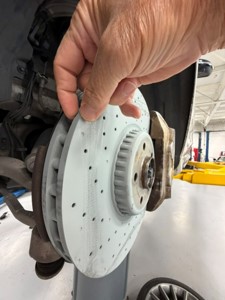
We recently replaced the front rotors on a Mercedes-AMG, and the parts that came off show exactly why that number matters. The photos throughout this article are from that job.
Reading the stamp on your rotor
The marking is usually cast or stamped on the rotor's hat (the center section that bolts to the hub) or on the outer edge of the friction ring. On many aftermarket and replacement discs sold for European vehicles, it is not optional: UN ECE Regulation 90, which governs replacement brake discs, requires each approved disc to be permanently marked with its minimum thickness alongside the manufacturer, approval number and traceability data.[1]
| Marking you may see | What it means | What to do with it |
|---|---|---|
| MIN. TH. 34 | Discard thickness is 34.0 mm | Replace the rotor when any measurement reaches 34.0 mm |
| MIN TH = 34 mm | Same meaning, different typography | Same rule; the unit is always millimeters |
| E-mark and "90R" code | ECE R90 approval for a replacement disc | Shows the part was tested against the regulation[2] |
| Part and batch numbers | Traceability to production | Useful if a recall or quality issue ever applies |
| Weight or mass value (carbon-ceramic) | Wear is judged by mass loss, not thickness | Needs weighing to the manufacturer's procedure |
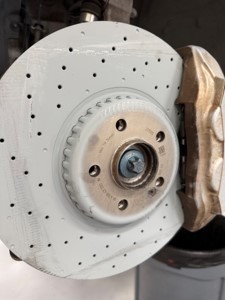
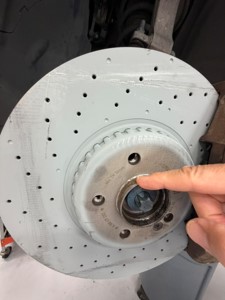
That figure isn't a rough guideline. It is an engineered limit that accounts for three things a rotor has to keep doing every time you brake: absorbing and shedding heat, resisting the stress of repeated heating and cooling, and staying rigid enough to hold a flat, even surface under the caliper's clamping force. Once a rotor wears to that number, all three start to fail at once.
Why a couple of millimeters matter: it's about heat
A brake does not really stop a car. It turns the car's motion into heat and puts that heat into the rotor. The rotor's job is to absorb it quickly and then shed it into the air between stops. How much its temperature climbs on any one stop depends largely on how much iron is there to soak up the energy.
On a ventilated rotor, wear comes off the two friction faces, or "cheeks," not the cooling vanes between them. That means the wear allowance eats into the part of the rotor that takes the heat first. Two millimeters off the total thickness can be a meaningful share of cheek mass.
Ten percent sounds small until you remember when it matters: the fourth hard stop coming down a parking garage ramp, a panic stop on I-635 after a long highway run, or a Texas August afternoon when the rotor starts hot before you ever touch the pedal. That is where a rotor at or below its stamp starts to fade, crack or distort, while a rotor with its full thickness still has room.
What changes once a rotor goes below the stamp
| What changes | What you may notice | Why it happens | Risk |
|---|---|---|---|
| Less heat capacity | Fade on repeated stops, a softer pedal when hot | Less metal to absorb the same energy, so peak temperatures climb | Safety |
| Heat cracking | Fine cracks radiating from drilled holes or the edge | Thinner cheeks see larger thermal swings each cycle | Safety |
| Distortion and thickness variation | Steering wheel shimmy or pedal pulsation | A thin ring is more prone to uneven heating and pad deposits | Comfort, wear |
| More caliper piston travel | Longer pedal, faster pad wear, possible seal stress | Pistons extend further to reach a thinner rotor with new pads | Component wear |
| Weaker vane structure | Usually nothing until failure | Cheeks get too thin to support the cooling vanes under load | Safety |
Don't let a new set of pads hide the problem
Fitting fresh pads to rotors at or near their minimum is one of the most common false economies in brake work. New pads are thicker, so the pistons sit where they did before and the pedal feels normal. The rotor, however, still has less iron than the system was designed around, and it will reach its limit long before the new pads do.
AMG rotor types, and how each one wears
AMG models use several rotor designs depending on the car, the brake package and the model year. The stamp means the same thing on each iron rotor, but the way wear shows up, and how it is judged, varies.
| Rotor design | How it's built | How wear is judged | What to watch for |
|---|---|---|---|
| One-piece cast iron | Friction ring and hat cast as one part | Thickness against the MIN. TH. stamp | Lip at the outer edge, heat spots, runout |
| Two-piece composite | Iron friction ring pinned or bolted to a lighter hat | Thickness against the stamp; hat joints inspected | Loose or corroded pins, noise from the joint |
| Cross-drilled or perforated | Holes through the friction faces for cooling and gas release | Thickness plus crack inspection around holes | Cracks linking hole to hole or reaching the edge |
| Carbon-ceramic | Ceramic matrix composite ring on a separate hat | Mass loss and surface condition to the manufacturer's procedure, not a thickness gauge | Surface pitting, chipped edges, pad life |
A note on AMG carbon-ceramic brakes
Carbon-ceramic rotors lose material through oxidation of the composite as much as through surface wear, so a thickness measurement can look perfect on a disc that is nearing its limit. That is why these rotors carry a reference mass rather than a thickness stamp, and why they should be weighed and inspected to the factory procedure. At several thousand dollars per corner, a proper inspection is cheap by comparison.
How a rotor should be measured
A quick look through the wheel spokes tells you very little. The outer lip, surface rust and the brightness of the friction band all mislead. The only answer that counts comes from a micrometer on the friction surface.
- Read the stamp firstNote the MIN. TH. value for that specific rotor. Front and rear rotors, and replacement parts from different suppliers, can carry different figures.
- Measure the friction band, not the edgeUse an outside micrometer on the swept surface, inboard of the lip and clear of drilled holes or slots.
- Take several readings around the rotorAt least four points spaced around the disc. The thinnest reading governs, not the average.
- Check thickness variation and runoutDifferences between readings, or lateral runout measured with a dial indicator, explain pulsation even when the rotor is above its minimum.
- Inspect the surfaceLook for heat cracks, blue or dark hot spots, deep scoring, and corrosion at the hat joint on two-piece designs.
Resurface or replace?
Having a rotor "turned" on a brake lathe used to be routine. On a modern rotor it rarely is. Machining removes metal to restore a flat surface, which means it spends the same wear allowance the stamp protects, and manufacturers already build that machining allowance into the minimum figure. A rotor near its minimum has nothing left to cut.
On a rotor with plenty of material and a runout problem, resurfacing can make sense. On most AMG rotors it rarely does, and on two-piece and carbon-ceramic designs it is generally not an option at all. Many Mercedes-Benz brake procedures favor replacing rotors with pads; the right call for your car depends on its specific procedure and what the measurements show.
| Situation | Typical recommendation |
|---|---|
| Well above MIN. TH., smooth, within runout spec | Reuse with new pads, if the procedure allows |
| Above MIN. TH. but with pulsation or light scoring | Evaluate machining only if enough material remains after the cut |
| Would fall below MIN. TH. after machining or within the next pad set | Replace rotors and pads together |
| At or below MIN. TH., or cracked | Replace immediately; do not machine |
| Two-piece composite or carbon-ceramic | Follow factory procedure; typically replaced or inspected by mass rather than machined |
Why this job calls for a Mercedes specialist
Replacing a rotor sounds simple on paper. On a Mercedes, and especially an AMG, several details separate a correct repair from one that only looks finished.
- Torque specs and hub seatingA rotor that isn't seated cleanly on the hub or torqued correctly can introduce runout, a slight wobble that causes pulsation even with brand-new parts.
- OEM or OEM-equivalent partsWe use Mercedes-specified rotors and pads to keep the friction and thermal behavior the car was engineered around, not a generic aftermarket substitute.
- Electronic parking brake service modeOn many Mercedes models the parking brake is built into the rear caliper. It has to be put into a retraction mode with factory-level diagnostic tools before the caliper can be serviced safely.
- Shim and pad orientationDirectional pads and shims only work when installed on the correct side and facing the correct way. More on that below.
- A proper bed-in before the car goes homeOne of the most commonly skipped steps at shops that don't specialize in European performance brakes.
What "bedding in" new brakes actually means
Fresh pads and a fresh rotor don't grip each other perfectly out of the box. Bare pad material against bare iron doesn't give the consistent friction your brakes are designed to deliver. Bedding in is the controlled process of laying a thin, even layer of pad material onto the rotor's surface before the car goes back into normal driving.
- Moderate stopsA series of moderate stops from around 40 mph down to a slow roll, repeated several times.
- A few firmer stopsSeveral firmer stops from a higher speed to build heat evenly across the pad and rotor.
- Cool-down driveSeveral minutes of driving without braking, so the transfer layer cures evenly.
Never sit at a full stop with hot brakes during bed-in
Holding a hot pad against one spot on the rotor "brands" an imprint into the surface. That high spot causes vibration and uneven wear for the life of those brakes. Skipping the bed-in, or leaving it to everyday driving, transfers pad material unevenly, which is often the real cause of the judder later blamed on "bad rotors."
Unidirectional pad shims, and why the side matters
Behind many brake pads sits a shim, a thin metal plate that dampens vibration and reduces noise. On many modern pads, including AMG-spec pads, that shim is unidirectional. It has a slight asymmetry, such as a chamfered edge or a crescent-shaped cutout, designed to work only when the pad faces the right direction on the correct side of the car.
| Installation | Result |
|---|---|
| Correct side, correct direction | As designed quiet, smooth braking |
| Correct side, installed backward | Noise high-pitched squeal, poor damping |
| Left and right pads swapped | Noise and harshness squeal or vibration unrelated to part quality |
Signs it's time to have your rotors measured
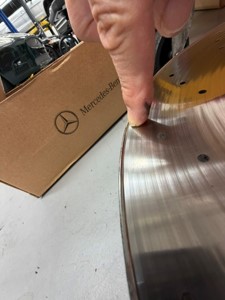
- A raised ridge you can feel at the outer edge of the rotor
- Pulsation in the pedal or shimmy in the steering wheel when braking
- The pedal feels longer or softer after repeated stops
- Fine cracks around drilled holes or along the edge
- Blue or dark patches on the friction surface
- A brake wear warning, or you're due for pads anyway
- Grinding or scraping that doesn't go away after a few stops
- A squeal that persists even with new pads installed
- Uneven or faster pad wear on one side than the other
- You're buying a used AMG and don't know its brake history
Because rotor wear is gradual, many owners don't notice until a pad replacement reveals the rotor is already at or past its minimum. That's why rotor thickness is worth checking any time new pads go on.
If you're shopping for a used AMG, rotor thickness is one of the easiest ways to find a four-figure bill before you sign. Our pre-purchase inspection includes measuring the brakes against their stamped limits.
Experience the Autoscope Assurance®
Mercedes-AMG brake service in Dallas and Plano
Factory-trained technicians measure every rotor against its stamp, check runout and thickness variation, and show you the numbers before recommending anything. We install the correct OEM-level parts with the right shim orientation and bed them in before your car leaves. Backed by our 3-year/36,000-mile labor warranty.
- Authentic OEM parts
- European specialists
- Factory diagnostic tools
- Free shuttle service
- 3-year/36,000-mile labor warranty
Learn more about our Mercedes-Benz service in Dallas and our suspension and brake service.
Mercedes-AMG rotor thickness: frequently asked questions
What does "MIN. TH." mean on a brake rotor?
It stands for minimum thickness. The number that follows, in millimeters, is the thinnest the rotor's friction surface may be before it must be replaced. It applies to the thinnest point measured, not an average.
Can I keep driving on a rotor that's right at the minimum?
A rotor at its minimum has used its full wear allowance and should be replaced. It will keep stopping the car in normal driving, but it has less capacity for heat, so it is more likely to fade, crack or distort under repeated or hard braking, which is exactly when you need it most.
Do I always need new rotors with new pads on an AMG?
Not always, but often. If the rotors are well above their minimum, flat and crack-free, they may be reused where the procedure allows. If they would reach the minimum before the new pads wear out, replacing both together is the better value and avoids a second brake job.
Where is the minimum thickness stamp located?
Usually on the rotor's hat, the center section around the lug holes, or along the outer edge of the friction ring. On some cars it is only visible with the wheel removed, and on older rotors it can be obscured by rust.
Why can't I just measure the rotor with a ruler or tire gauge?
The margin is small, often two millimeters or less across the whole rotor, and the outer lip stays near its original thickness. A ruler can't resolve the difference, and measuring on the lip reads high. A micrometer on the friction band at several points is the reliable method.
How are AMG carbon-ceramic rotors checked?
Carbon-ceramic rotors lose material through oxidation as well as surface wear, so thickness alone is not a reliable guide. They carry a reference mass and are assessed by weight and surface condition according to the factory procedure.
Can worn AMG rotors be resurfaced?
Only if enough material remains above the minimum after machining, and only where the procedure allows it. Two-piece composite and carbon-ceramic rotors are generally not machined. In practice, most AMG rotors near their limit are replaced.
Why do new brakes need to be bedded in?
Bedding in lays an even layer of pad material onto the rotor so the two grip consistently. Without it, material transfers unevenly, which can cause judder, pulsation and weaker braking a few months later.
Why do my new brakes squeal?
On pads with directional shims, a squeal often means a pad was installed backward or on the wrong side. Glazed pads from a skipped bed-in and worn hardware are other common causes. It is rarely a sign of poor-quality parts.
Does Dallas heat affect how fast rotors wear?
High ambient temperatures and stop-and-go traffic mean rotors start hotter and have less time to cool between stops. That doesn't change the stamped limit, but it makes the heat margin a thin rotor has lost more noticeable, particularly in summer traffic.
Sources
- UNECE, Regulation No. 90, "Uniform provisions concerning the approval of replacement brake lining assemblies, drum brake linings and discs and drums," section 6.2.2 marking requirements. unece.org
- ATE Brakes, "ECE R90 for brake discs." ate-brakes.com
- BrakeRotorsReplacementCost.com, "Brake Rotor Minimum Thickness." brakerotorsreplacementcost.com
- NRS Brakes, "What Is Brake Bedding-In and Why Is It Crucial for New Brake Pads." nrsbrakes.com
- Ferodo, "Directional Brake Pads: Installation Guide." ferodo.com